 Rowcall
Running a QA pass with Rowcall
This tutorial walks through a complete manual testing workflow: turning a release into a test plan, running the pass, reading coverage, and keeping a record. It takes about 10 minutes to follow along - every new account starts with a small Demo project you can poke at instead of starting blank.
1Create a project
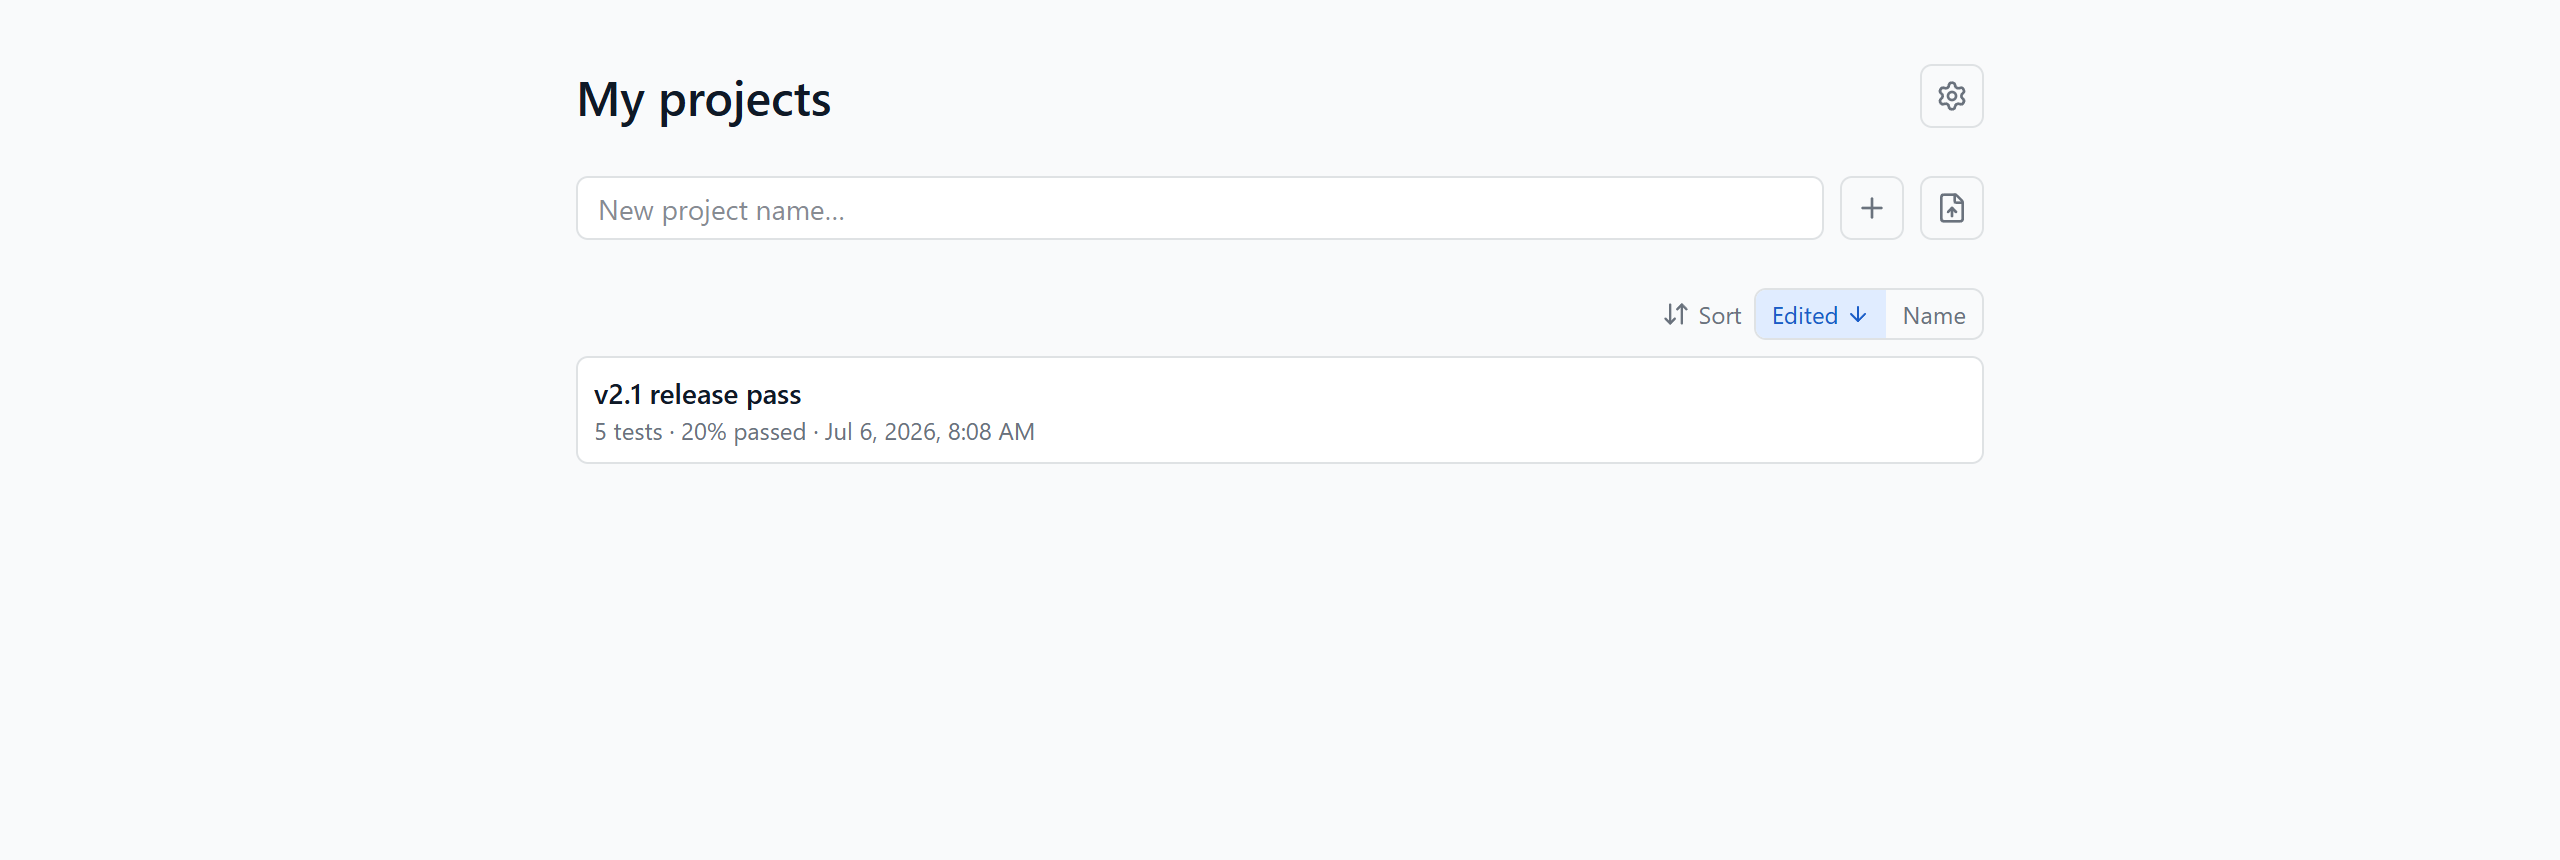
A project is one test plan - typically a release, a feature area, or a recurring regression pass. After signing in you land on My projects: type a name (say, “v2.1 release pass”) and press Enter to create it. Each project keeps its own tests, lists, and history, and you can rename, duplicate, or reorder projects from this page later - duplicating last release's project is the fastest way to start the next one.
2Add your first test row
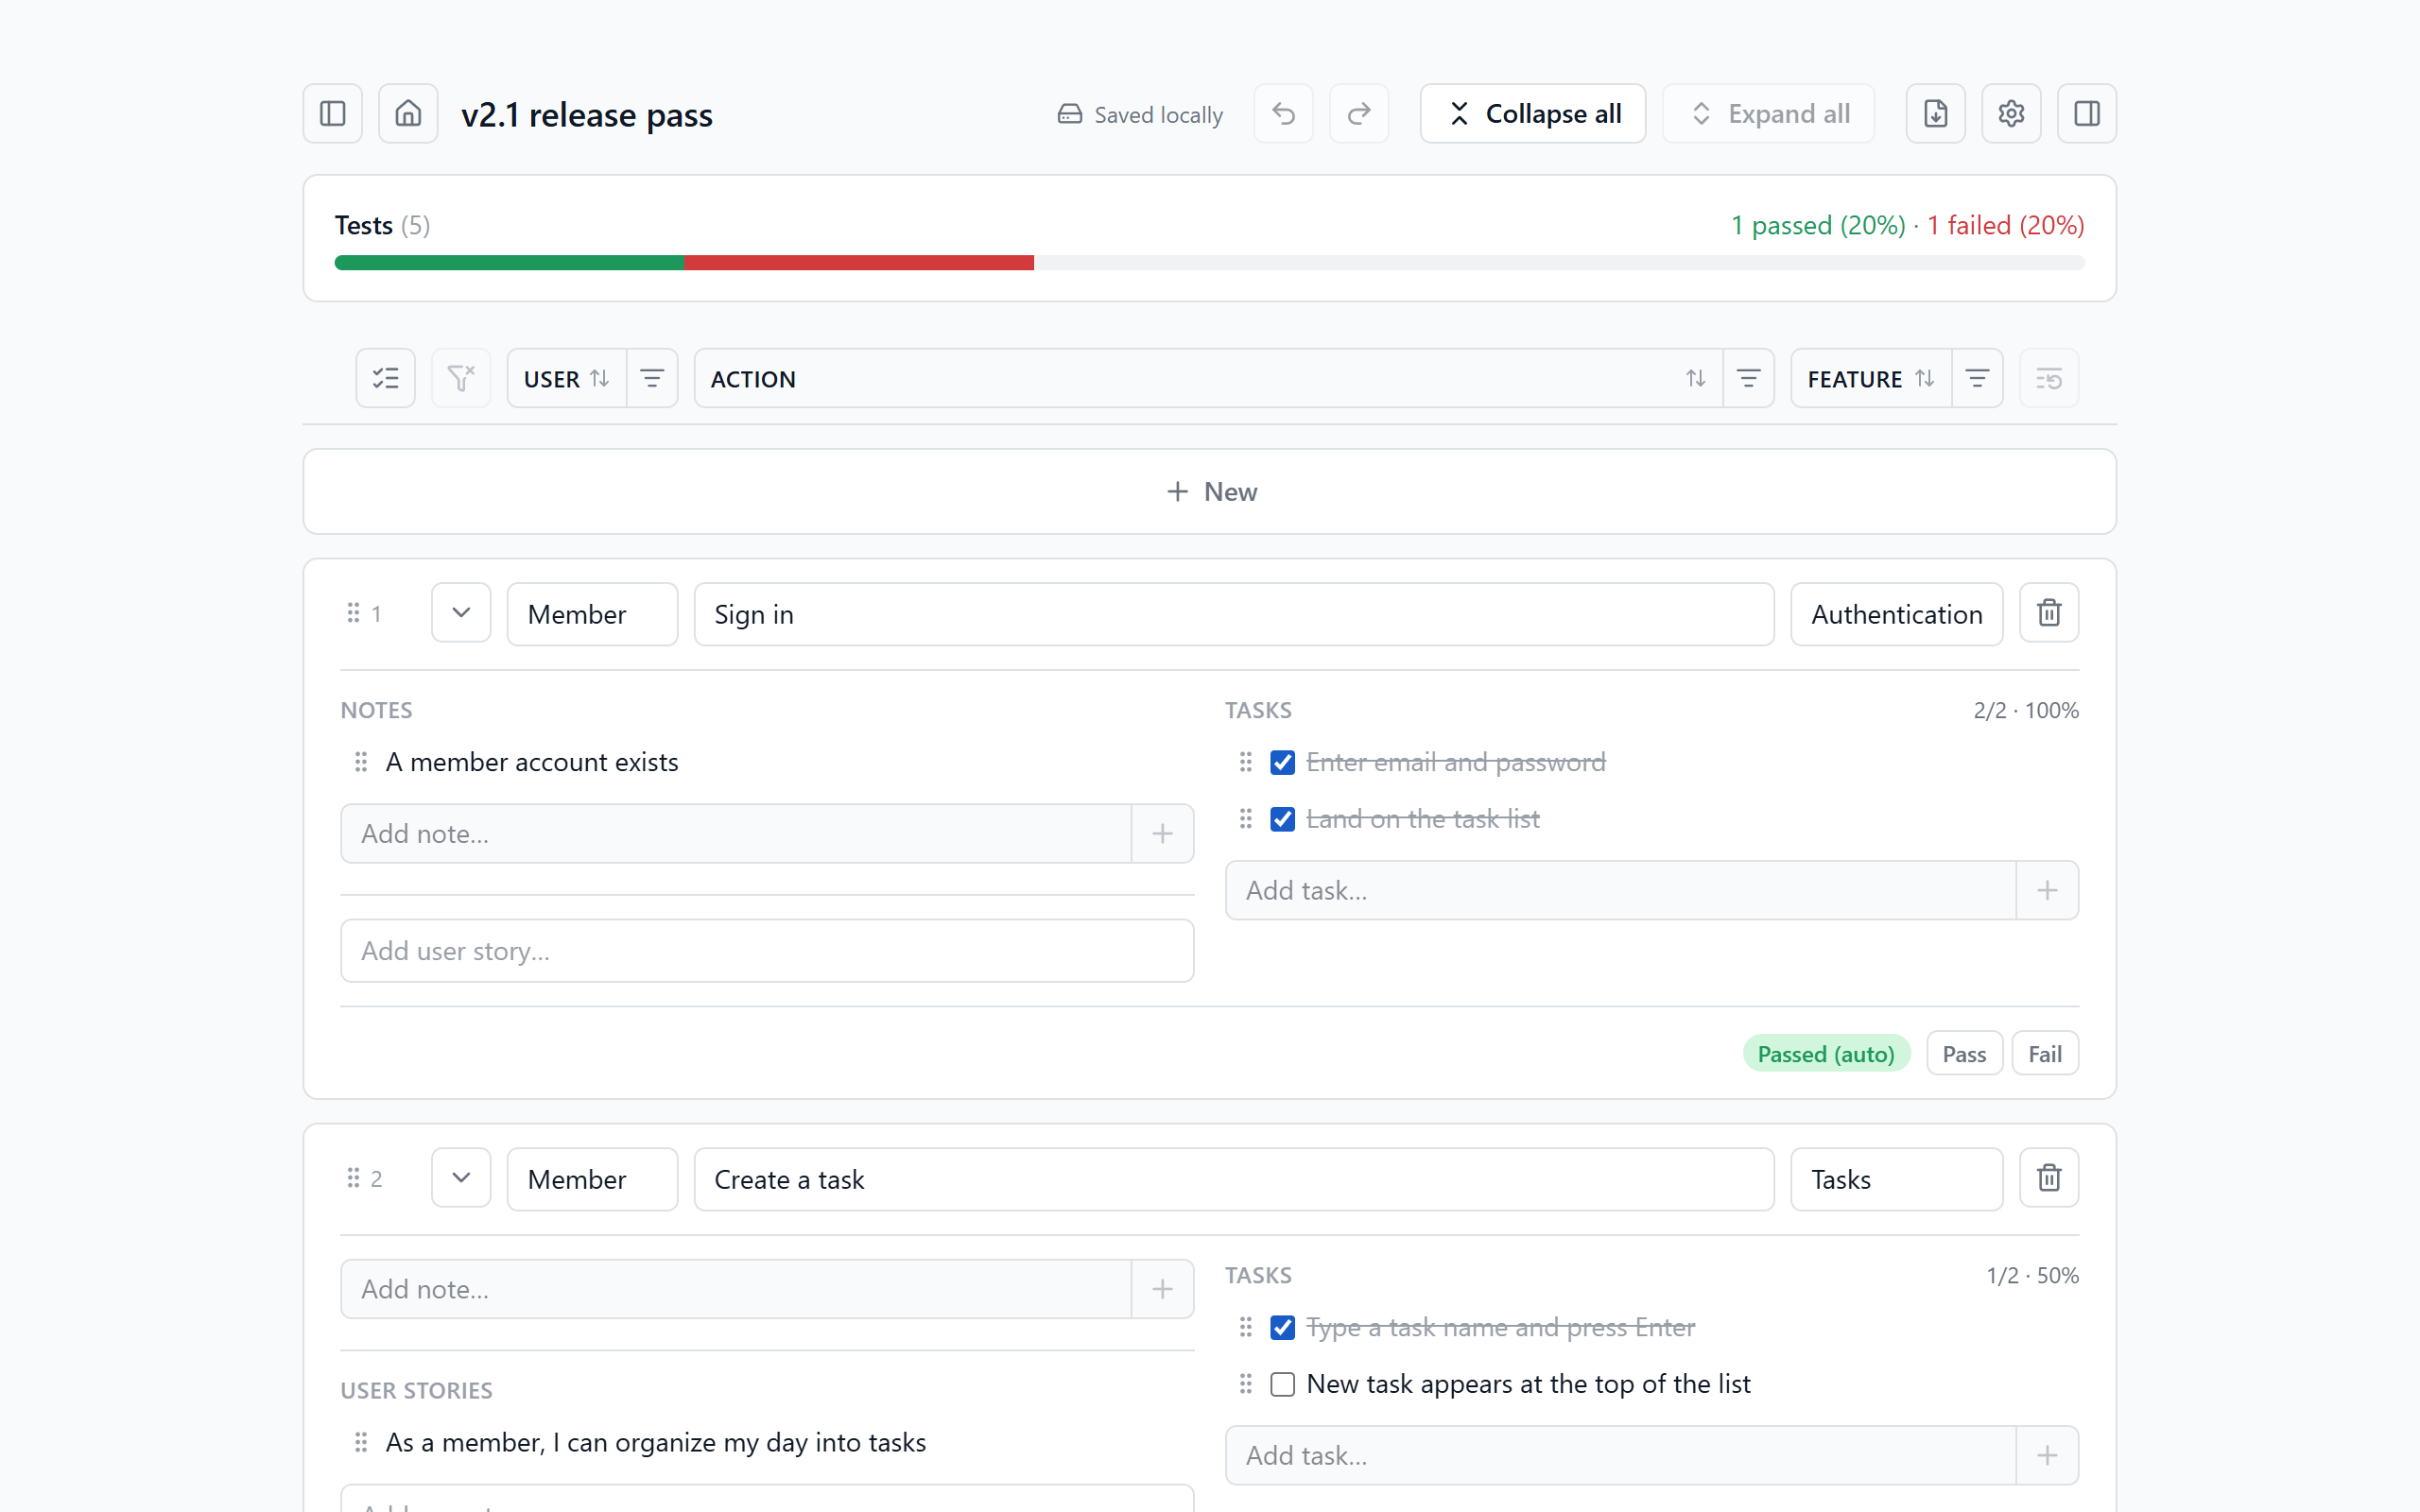
Every test in Rowcall is a row that answers three questions: who (User), what (Action), and where (Feature). “Member · Sign in · Authentication” is one test; “Admin · Sign in · Authentication” is a different one.
Click the + New row and fill the three fields. Each field is a dropdown of everything you've used before - type to filter, or add what you typed as a new entry. Two rules keep the plan clean automatically:
- No duplicate tests. One row per unique User + Action pair - combinations that already exist show up disabled in the dropdown.
- One feature per action. An action belongs to a feature, so the Feature field unlocks after you pick an Action, and setting it updates every row with that action.
3Add notes and tasks
Expand a row to describe how to run the test:
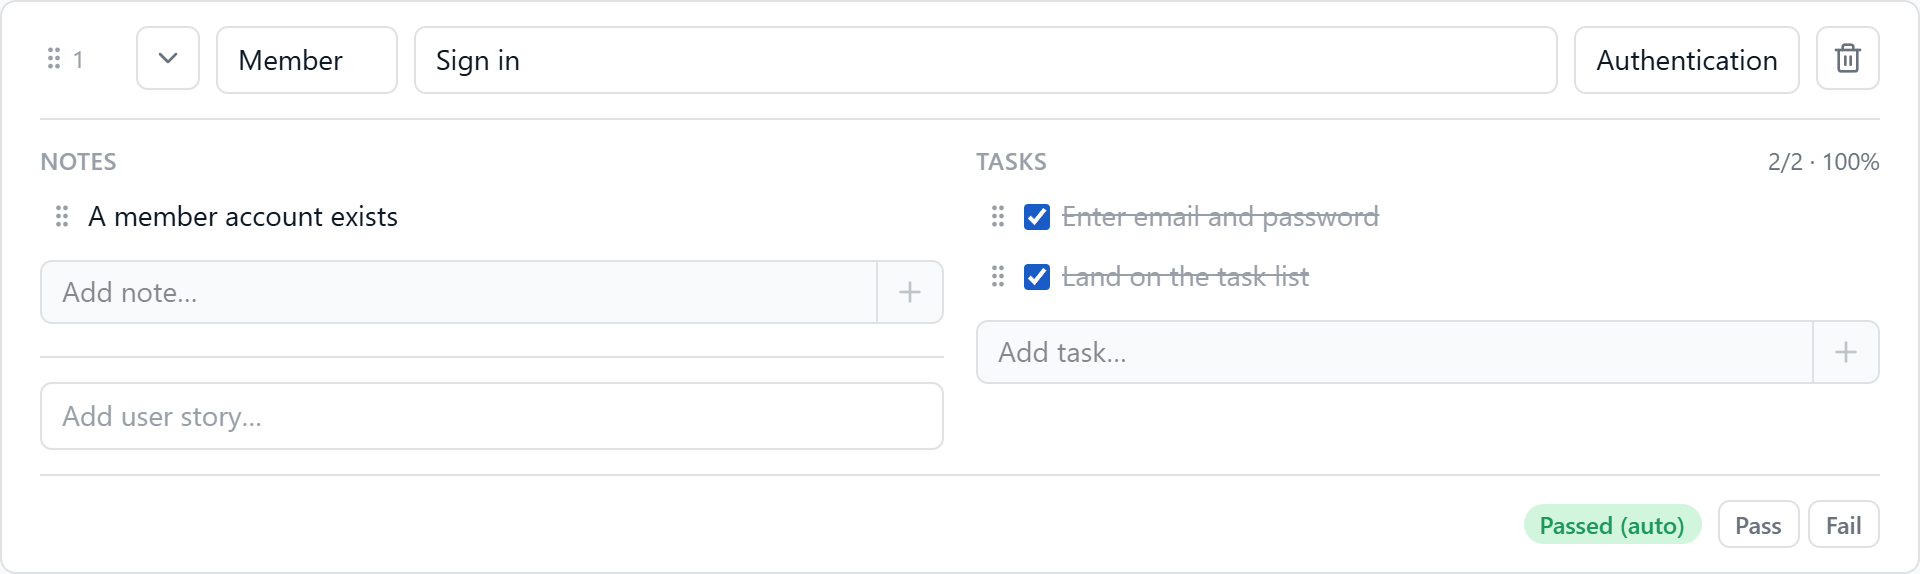
- Notes capture setup and preconditions - “A member account exists”, “Requires at least one open task”. Reorder them by drag, edit inline.
- Tasks are the actual steps to verify, each with a checkbox - “Enter email and password”, “Land on the task list”.
- User stories can be linked to a row, so a story like “As a member, I can organize my day into tasks” ties together the tests that prove it.
Statuses do the right thing on their own: when every task in a row is checked, the test passes automatically. Found a bug even though the steps completed? Override with the manual Fail mark (or Pass a test with no tasks) - a second click reverts to automatic.
4Build out the plan
Now fill the matrix. A practical order: list the features in this release, break each into the actions a user can take, then add a row for each user type that should exercise the action. Free/member/admin, guest/signed-in - whatever your product's roles are.
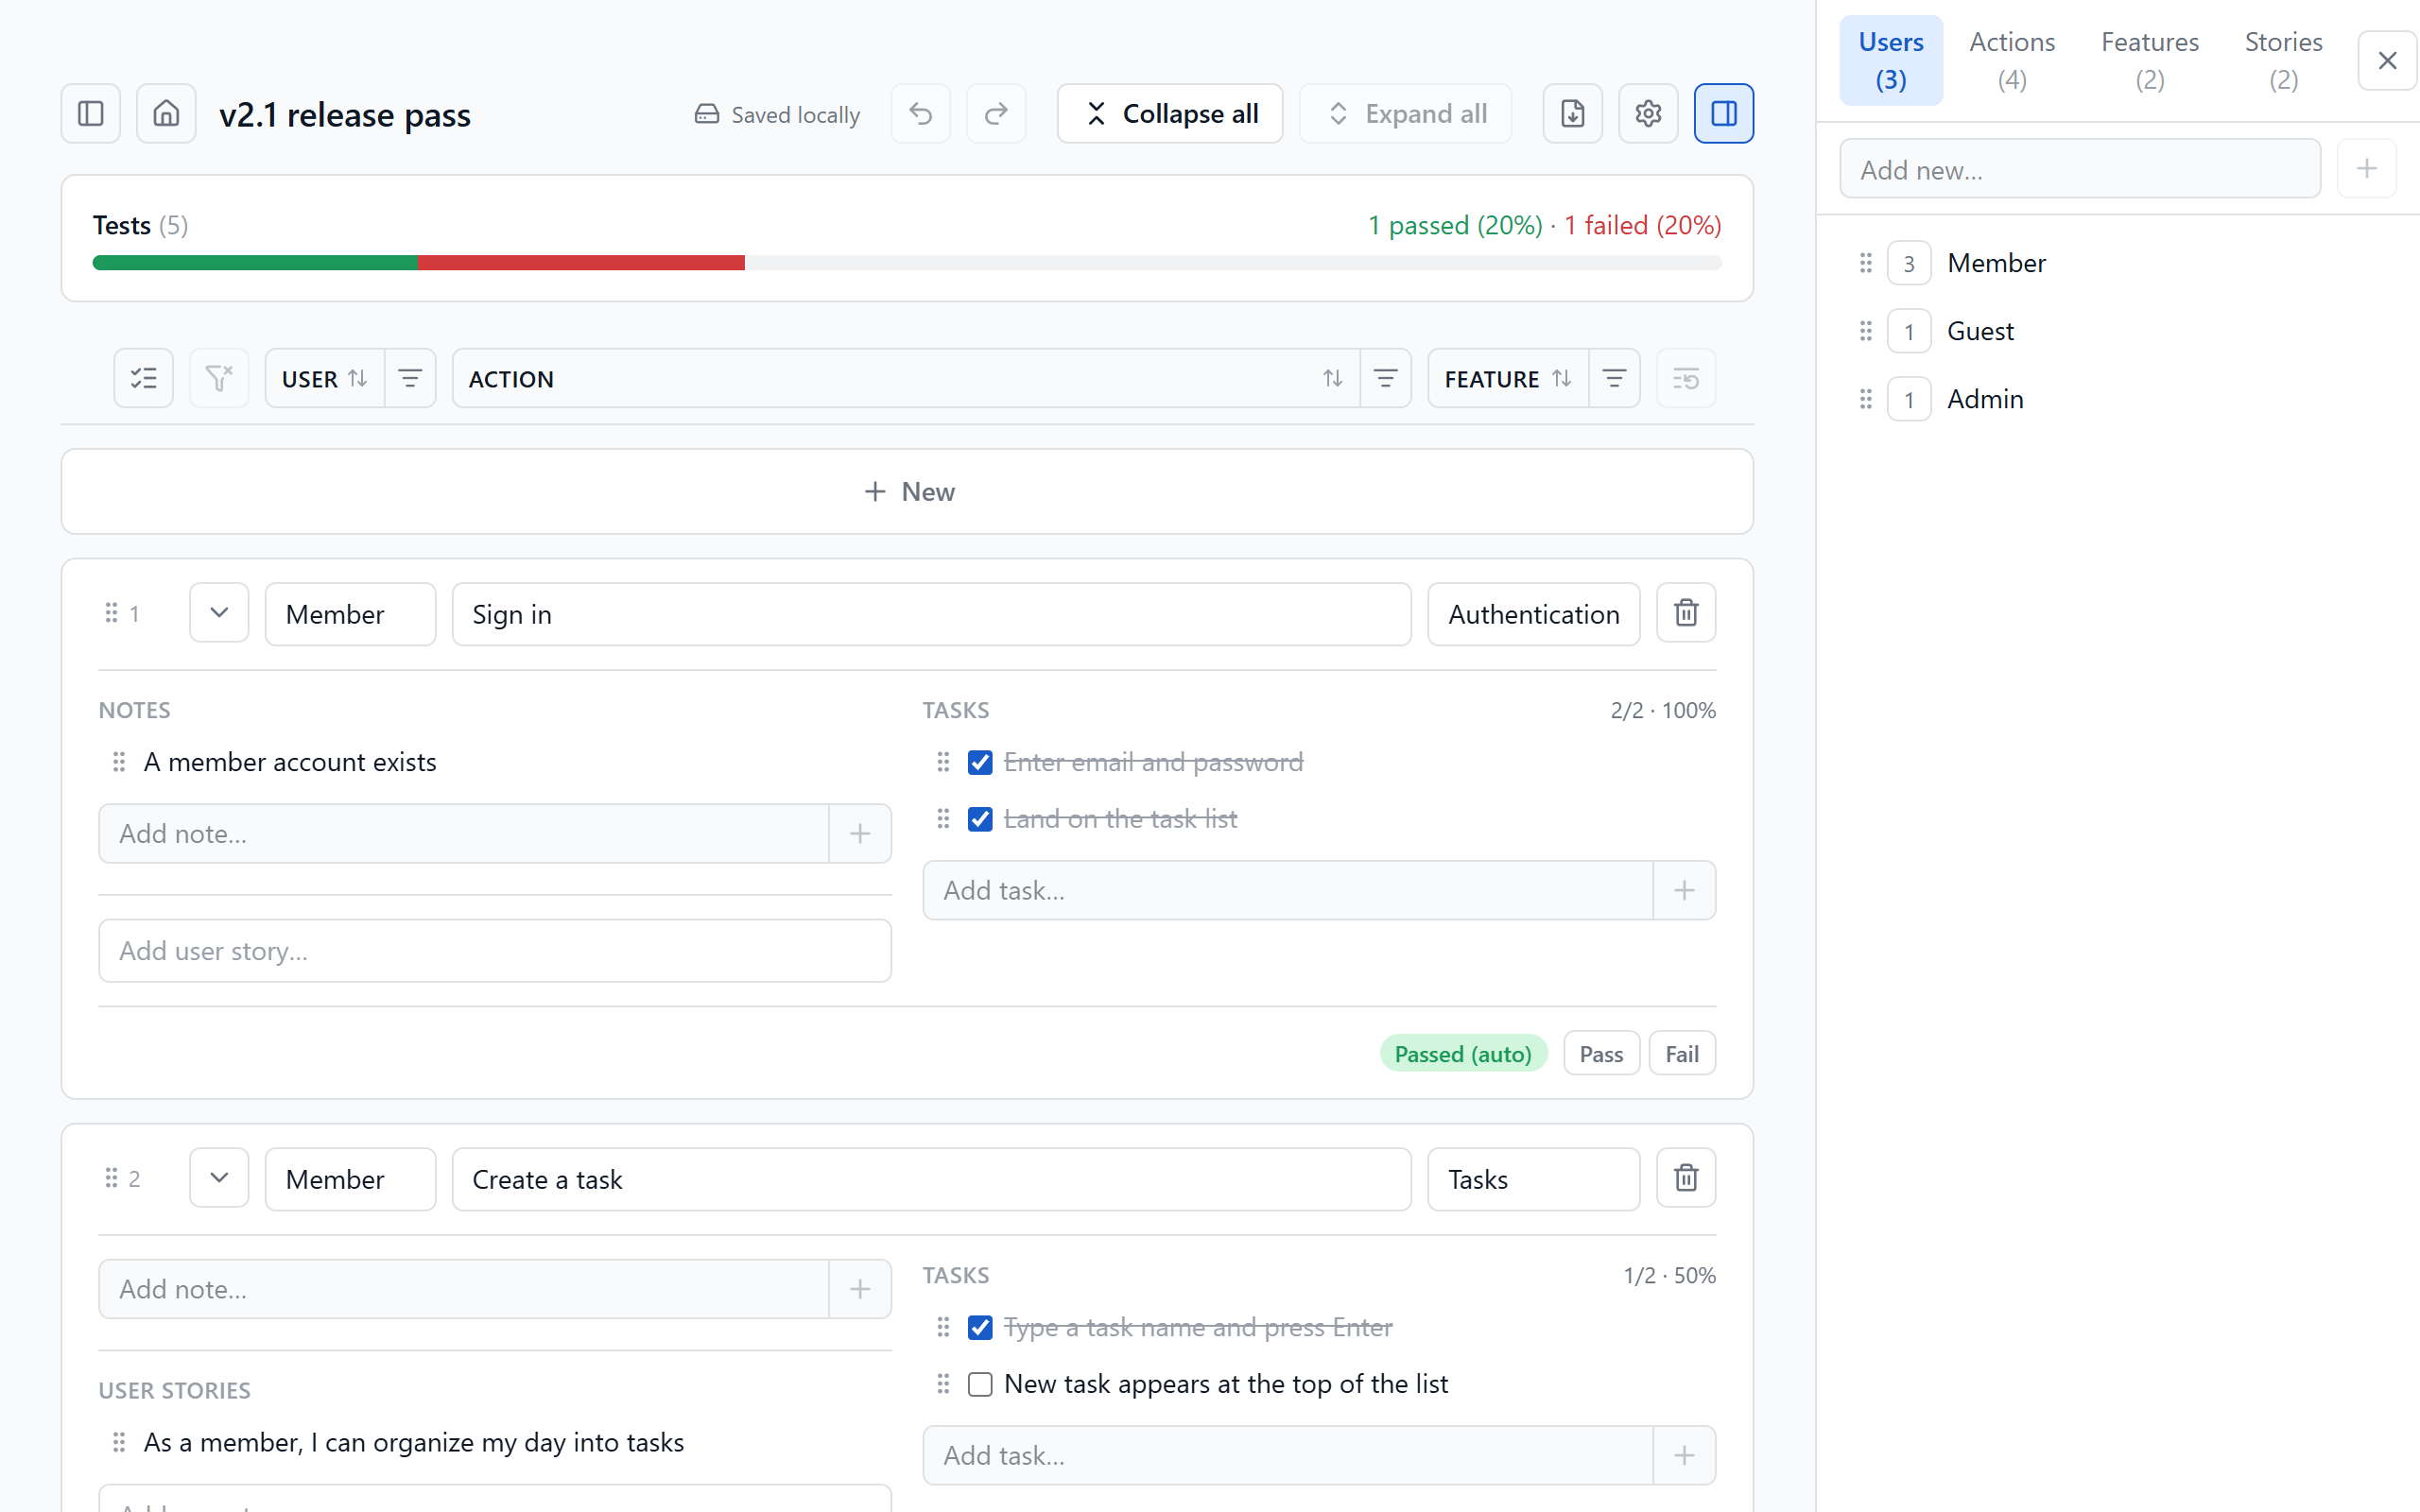
The lists panel (the panel icon at the top right) shows Users, Actions, and Features as editable tabs, side by side with your tests - rename an entry once and every row updates. Add rows with the + New buttons at the top and bottom of the list, or hover between rows for an insert button. Drag rows into the order you'll actually execute - walking the app in a sensible sequence beats jumping between features. Collapse all turns long rows into one-line summaries when you want the overview.
5Run the pass
Testing day. Work top to bottom: do the setup in the notes, perform each task, check it off. Rows flip to Passed as their tasks complete, and the dashboard above the rows fills in - passed and failed counts, percentages, and a progress bar for the whole run.
The column headers double as coverage tools: click a header's label to sort by that field (ascending, descending, back to your custom order), or its right half to filter - “show me everything the Guest user still has pending”, “only Billing tests”. While a filter is active the dashboard adds an In current filter line, so you can read coverage per feature or per user directly. One button resets all filters when you're done.
And if anything goes sideways - a mis-click, a deleted row - everything is undoable with Ctrl+Z (redo with Ctrl+Shift+Z or Ctrl+Y). Every change saves to your device instantly, so losing your connection mid-run costs you nothing.

6Record and repeat
When the run is done, click the export icon in the toolbar to download the whole project as an Excel workbook - tests, notes, tasks, statuses, and stories - a self-contained record you can attach to the release notes or share with anyone, no account needed.
For the next cycle, go the other way: import a workbook from My projects to create a fresh project from it. Export at the end of each release, import to start the next, and you have a papertrail of every QA pass. (The Demo project in new accounts is imported from exactly such a workbook, so it doubles as a template for the format.)
Cheat sheet
- Ctrl+Z undo · Ctrl+Shift+Z / Ctrl+Y redo - works for rows, checklists, reorders, deletions.
- Click the project name in the toolbar to rename it.
- All tasks checked = automatic pass; manual Pass/Fail overrides; click again to revert to auto.
- Header label = sort, header right half = filter; custom drag-order is the default sequence.
- Offline is fine: everything saves locally first. Cloud accounts sync when you're back online.